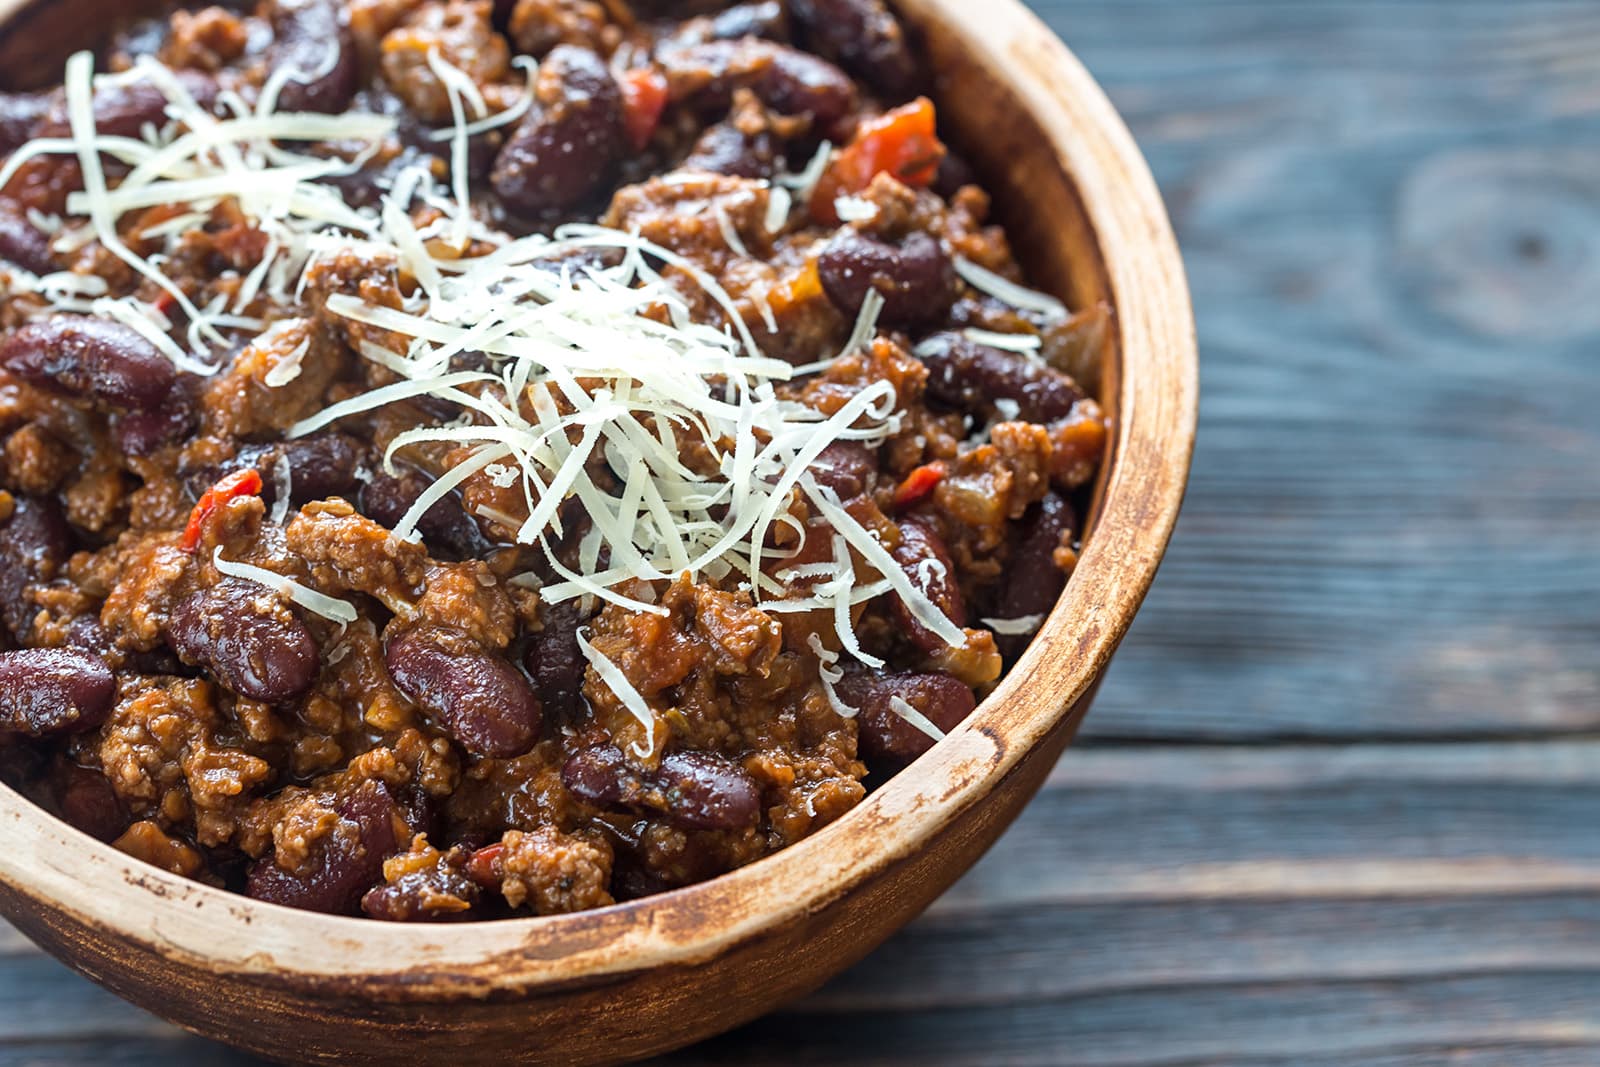
Midnight Smoke Three-Meat Chili
Three meats, a two-hour simmer, and smoke that gets quieter and deeper the longer it cooks.
Bacon, pork shoulder, and ground beef layered into a deep, chile-forward chili built around Midnight Smoke Chili Rub. A whole dried chile paste gives the base its fruity depth. The smoke is loud at the bloom and composed by the finish. Apple cider vinegar brightens the last five minutes, and the reserved crispy bacon comes back at the end as the texture the bowl needs.
Ingredients, method, and practical notes
Equipment
Method
Heat a small dry skillet over medium heat. Add the guajillo and arbol chiles and press flat with a spatula. Toast for 30 to 45 seconds, turning once, until fragrant and slightly darkened. Transfer to a heatproof bowl immediately.
👁 The chiles darken slightly and release a warm, nutty aroma. They should not smoke heavily or show black spots.WhyA brief dry toast opens the chiles and intensifies their fruity, earthy depth. Longer than 60 seconds and they turn bitter.What to noticeThe aroma shifts from dusty and flat to warm and slightly smoky within the first 20 seconds. That shift is the signal to flip and then transfer.If something's offThe chiles are blackened or smell acrid rather than toasted.Fix: Discard and start again with fresh chiles. Reduce heat to medium-low. The pan was too hot, or the chiles sat too long.
Pour the just-boiled hot water over the toasted chiles in the bowl. Press them down to submerge. Let soak for 10 minutes while you prepare the remaining ingredients. The chiles must be fully softened before blending.
👁 After 10 minutes, the chiles are pliable and deep, with no stiff or leathery sections. Pressed between two fingers, they yield completely.WhyFully softened chiles blend into a smooth, cohesive paste. Under-softened chiles produce a gritty paste with large flecks that never fully integrate into the chili.What to noticePress a chile between two fingers at the 8-minute mark. It should feel completely pliable, like a wet leaf, not stiff or resistant.Transfer the softened chiles and all of the soaking liquid to a blender. Blend on high for 45 to 60 seconds until completely smooth. The paste should be deep red and glossy. Set aside.
👁 A smooth, deep red paste with no visible chile flecks. Consistency is slightly thinner than tomato paste.If something's offThe paste is gritty or shows visible flecks even after 60 seconds of blending.Fix: The chiles were not fully softened. Add 2 tablespoons of additional hot water and blend again for another 30 seconds.
Add the bacon pieces to a large Dutch oven or heavy-bottomed pot (at least 6 quarts) over medium heat. Cook, stirring occasionally, for 10 to 12 minutes until the fat is fully rendered and the bacon is crisp and deeply browned. Transfer the bacon to a plate lined with paper towels. Spoon 1 tablespoon of the rendered fat into a small heatproof bowl and reserve it for the spice bloom in step 9. Leave the rest of the fat in the pot.
👁 Bacon pieces are deep golden to dark brown with crisp edges. The fat in the pot is clear and shimmering, with one spoonful set aside in a bowl.WhyRendering the bacon slowly over medium heat extracts the fat without burning it. That fat is the cooking medium for everything that follows, and the reserved tablespoon guarantees the spice bloom in step 9 has fat to open into after the onions have absorbed most of what is in the pot. The crisped bacon is set aside now and comes back at the very end as the textural element that makes each bowl.What to noticeThe sound transitions from a lively spit-and-sizzle of wet fat releasing to a quieter, steadier crackle as the bacon crisps. That quieter crackle means you are close.If something's offThe bacon is deeply browned on the outside but still soft and chewy inside.Fix: Reduce heat slightly and cook for 2 to 3 more minutes. The fat needs more time to render fully.
Increase heat to medium-high. Pat the diced pork shoulder completely dry with paper towels. Working in batches if needed to avoid crowding, add the pork in a single layer and cook without moving for 3 to 4 minutes until a deep brown crust forms on the underside. Turn and cook for another 3 to 4 minutes. Transfer to the plate with the bacon.
👁 Deep mahogany-brown crust on at least two sides of each piece. No gray or steamed surfaces.WhyPatting the pork completely dry before it hits the fat ensures direct contact with the hot surface rather than steam. Wet surfaces steam rather than sear, producing gray meat with no crust and less flavor development in the base. The shoulder also renders additional fat as it browns, feeding the pot rather than draining it.What to noticeListen for an immediate, aggressive sizzle when the first piece of pork hits the pot. If the sizzle is quiet or absent, the fat is not hot enough. Remove the pork and wait.If something's offThe pork releases liquid and the pot fills with steam. The pieces are gray rather than browned.Fix: The pot was overcrowded or not hot enough. Transfer the pork back to the plate, wipe the pot, reheat the fat over medium-high, and sear in smaller batches.
Add the ground beef to the pot. Cook over medium-high heat, breaking it into pieces with a wooden spoon, for 6 to 8 minutes until well browned with no pink remaining and a mix of browned edges throughout. Transfer to the plate with the pork and bacon.
👁 Crumbled beef with browned, slightly crisp edges throughout. A thin layer of rendered fat remains in the pot.WhyWell-browned ground beef contributes more savory depth to the finished chili than beef that is simply cooked through. The browned coating building on the pot bottom is concentrated flavor that later steps will put to work.If something's offThe beef steams in its own liquid and sits in a pool of gray liquid rather than browning.Fix: Carefully tip the pot and spoon out excess liquid. Increase heat to medium-high. Let the beef sit undisturbed for 2 minutes to allow browning to develop before stirring.
Reduce heat to medium. Add the diced onions and a pinch of salt to the remaining fat. Cook, stirring occasionally, for 8 to 10 minutes until the onions are soft and golden at the edges. The water the onions release will loosen the browned coating from the pot bottom. Stir and scrape so that flavor dissolves into the onions rather than scorching.
👁 Onions are translucent and soft with golden edges. The pot bottom is mostly clean, its browned coating dissolved into the onions.WhyThe onions only need to reach soft and golden here. The two-hour simmer ahead will do the deep development work that extended stovetop caramelization would otherwise provide, so the extra time buys almost nothing in the finished bowl. Their released moisture also does the first cleanup of the pot, carrying the browning from three meats into the base instead of leaving it to scorch.What to noticeAs the onions release their water, you will hear the sizzle quiet down and see the browned patches on the pot bottom loosen and disappear into the onions. That flavor is not lost. It has moved into the dish.If something's offDark spots forming on the pot bottom faster than the onions can release moisture to lift them.Fix: Reduce the heat and add 2 tablespoons of water to lift the sticking. Scrape, then continue.
Push the onions to the sides of the pot. Add the minced garlic and tomato paste to the center and cook, stirring, for 2 to 3 minutes until the tomato paste shifts from bright glossy red to a darker, matte brick red and the garlic smells sweet rather than sharp.
👁 Tomato paste has darkened noticeably and smells roasted and savory, not raw or acidic. The garlic is fragrant but not browned.Bloom PhaseWhyCooking tomato paste against the hot surface before adding liquid drives off moisture and converts its raw, acidic character into roasted savoriness. The paste will stick and sizzle slightly. That sticking builds a new browned coating, and the wine two steps from now is what lifts it.What to noticeThe paste will catch and stick to the bottom in places. Stir it free and continue. The sticking is a sign that it is working.If something's offThe tomato paste turns black and smells scorched.Fix: Heat is too high. Reduce to medium, add the garlic immediately, and move directly to the next step.
Pour the reserved tablespoon of bacon fat into the center of the pot. Add the Midnight Smoke Chili Rub, ground cumin, ancho chile powder, black pepper, cocoa powder, and brown sugar directly into that fat. Stir constantly for 45 to 60 seconds until the spices are fully combined with the fat and their aroma shifts from dusty and raw to warm and toasted.
👁 The pot smells deeply smoky and warm. The spices form a thick, fragrant paste clinging to the onions and tomato paste.Bloom PhaseWhyBlooming the spices in fat opens their aroma and binds it to the oil, which then carries those compounds through the entire dish. By this point the onions have absorbed most of the free fat in the pot, which is why the reserved tablespoon goes in first. Midnight Smoke added directly to liquid will color the chili but will not distribute its smoke depth the same way. This 45 seconds of attention matters more than it sounds.What to noticeThe aroma shifts noticeably within the first 20 seconds. Raw, dusty spice smell gives way to something warmer and deeper. Stop stirring when the pot smells like the chili should taste.If something's offThe spices are burning and smelling acrid rather than warm and toasted.Fix: Remove the pot from heat immediately and pour in the wine. The residual heat will continue the bloom without further burning.
Pour in the red wine or dark beer and stir vigorously, scraping the browned coating off the bottom of the pot. Simmer for 2 to 3 minutes until the liquid reduces by about half and the sharp alcohol smell softens.
👁 The liquid is dark, glossy, and visibly reduced. The bottom of the pot is completely clean.WhyThe browned coating from the tomato paste and the meats is concentrated flavor, and the wine enters here, before the chile paste, because this is the last moment that coating still exists to be lifted. The short reduction concentrates the wine's fruit and cooks off its raw alcohol edge before the tomatoes arrive to dilute it.What to noticeThe wine will bubble hard on contact and darken as it picks up the browning. When the spoon leaves a brief trail across the pot bottom, the reduction is done.Pour in the blended chile paste and stir to combine with the reduced wine and bloomed spices. Cook over medium heat for 2 minutes, stirring frequently, until the paste deepens slightly in color and the raw, fruity smell of the fresh paste gives way to something roasted.
👁 The paste has darkened slightly and smells rich and roasted. No raw or sharp edge remains.Bloom PhaseWhyCooking the raw chile paste briefly before the bulk liquid goes in removes its raw edge and integrates it with the bloomed spices and reduced wine, creating a unified base rather than separate flavor elements.Return the browned pork shoulder, ground beef, and roughly three-quarters of the reserved bacon to the pot, keeping the remaining bacon aside for serving. Add the crushed tomatoes, soy sauce, and the 1/2 cup (120ml) water. Stir to combine. Increase heat to medium-high and bring to a gentle, steady simmer.
👁 A deep, dark red chili with visible chunks of meat throughout. Small bubbles break the surface steadily.Cook-In PhaseWhyReturning the meats at this point means they will finish cooking in the seasoned base, absorbing the accumulated flavors of every step before them rather than sitting apart from them. The beans wait until later so the long simmer works on the meat without breaking them down.Reduce heat to low. The chili should simmer at a bare, lazy pace with just an occasional bubble breaking the surface. Cook uncovered, stirring every 20 minutes, for 80 minutes. The chili will darken and thicken noticeably. If it thickens faster than expected and starts to stick, add water 1/4 cup (60ml) at a time.
👁 The chili is darker and thicker than when the simmer began, and the surface shows slow, occasional bubbles rather than steady activity.Cook-In PhaseWhyThis is where Midnight Smoke does its most important work. The smoke and chile character that were loud and forward at the bloom stage deepen and round over the long simmer. The cinnamon and cardamom in the blend, which contribute little in the first 30 minutes, gradually surface as a rounding element that extends the finish and prevents the smoke from turning harsh. High heat or a covered pot will prevent the smoke from mellowing properly.What to noticeTaste the chili at 45 minutes. The smoke is still clearly present but the sharp, forward edge has started to soften, and the meaty richness from the three proteins is starting to catch up.If something's offThe simmer keeps climbing to a steady, vigorous bubble whenever you walk away.Fix: Use your burner's lowest setting, or slide the pot half off the burner. A true low simmer is one or two lazy bubbles every few seconds.
Stir in the drained kidney beans. Continue the bare simmer, uncovered, for another 35 minutes. By the end, the pork shoulder pieces should pull apart easily when pressed with the back of a spoon and a spoon dragged across the bottom of the pot should leave a trail that holds for 2 to 3 seconds before closing.
👁 Beans are heated through and seasoned but intact, holding their shape. The pork yields completely to the back of a spoon.Cook-In PhaseWhyForty minutes in the pot, counting the finishing step, is long enough for the beans to absorb the base and taste seasoned through, and short enough that they hold their shape. A full two-hour simmer would break them down to mush and cloud the texture of the finished bowl.What to noticeTaste at the 90-minute mark of total simmering. Smoke and chile now feel woven into the base rather than layered on top. A quiet warmth lingers at the end of each taste rather than a spike.In the final 5 minutes of cooking, stir in the apple cider vinegar. Taste and add salt as needed, starting with 1/2 teaspoon and adjusting from there. The chili should taste bright but not acidic, and seasoned all the way through.
👁 The chili tastes focused and complete, rich without coating the palate.Finish PhaseWhyAdding vinegar in the final 5 minutes preserves its brightness. Added earlier, the acid would cook out and flatten rather than lift. Salting at this stage, rather than throughout, lets you account for the cumulative saltiness of the bacon, soy sauce, and Midnight Smoke Chili Rub.What to noticeTaste the chili immediately before and immediately after the vinegar. The before version should taste rich and slightly heavy. After the vinegar, the flavors should seem to come into focus without tasting sour. That lift without sourness is the right amount.If something's offThe chili tastes sour or distinctly acidic after adding the vinegar.Fix: Add 1/2 teaspoon of brown sugar and stir. Wait 1 minute and taste again. The sugar will blunt the acidity without sweetening the chili.
Remove the pot from heat. Rest uncovered for 10 minutes before serving. The chili will thicken slightly as it settles. Ladle into bowls and top each portion with the reserved crispy bacon, crumbled coarsely so each bowl gets several distinct pieces.
👁 After 10 minutes, the chili has settled and thickened slightly, with small pools of golden fat on the surface.Rest PhaseWhyThe 10-minute rest lets the fat redistribute and the flavors unify. The crispy bacon returned at this moment is not a garnish. It is the disruptive texture that the bowl needs. The crunch of the bacon against the rich, soft chili base is the contrast that keeps each bite interesting and asks for the next one.What to noticeEvery spoonful should have a piece of bacon in it. Crumble it coarsely, not finely, so the texture survives contact with the warm chili long enough to do its job.
What This Recipe Teaches
How Midnight Smoke's smoke and chile character transform over two hours of gentle heat, moving from loud and assertive at the bloom to composed, woven, and inseparable from the dish by the finish.
How the Blend Behaves Here
Midnight Smoke opens during the bloom step, releasing its smoked paprika and ancho chile immediately into the reserved bacon fat. At this stage, the smoke is distinct and forward. Over the following two hours, the blend's cinnamon and cardamom, which contribute little in the early stages, gradually surface as a rounding element that extends the finish and prevents the smoke from sharpening into harshness. By the end of the simmer, you cannot pick out the blend as a separate element. It has become the structural flavor of the dish.
What to Notice
Aromatic entry: Dark, toasted chile and smoke rising from the bowl before the spoon. Rendered bacon underneath everything.
Mid-palate: Rich, layered meat with steady warmth from the chile and pepper. The smoke is structural now, not identifiable as a distinct element. Kidney beans provide mild earthiness and body. Nothing spikes.
Lingering finish: A warm, composed fade with a clean lift from the apple cider vinegar that keeps the richness from coating the palate. The crispy bacon, when it arrives in a bite, resets everything and asks for another spoonful.
The Time Progression Test
How the same blend tastes different at 45 minutes, 90 minutes, and 2 hours. This is the direct, in-the-bowl demonstration of why Midnight Smoke is a cook-in blend and not a finishing blend.
How: Ladle a small portion into a ramekin at three points during the simmer: 45 minutes, 90 minutes, and the end of cooking. Let each portion cool to tasting temperature before sampling. Use a clean spoon for each.
Compare: Track two things at each tasting: how assertive the smoke feels, and how long the warmth lingers after you swallow. At 45 minutes, the smoke is loud and the warmth has a slight edge. At 90 minutes, both have softened and started to round. At 2 hours, the smoke is deep and composed and the warmth has become a steady presence rather than a spike.
Symptom: The smoke tastes harsh or aggressive even after 2 hours of simmering
Cause: The simmer was too vigorous. A hard simmer concentrates smoke faster than the rounding elements in the blend can catch up, leaving the smoke without its moderator. A covered pot creates the same problem by preventing the smoke from mellowing through gentle evaporation.
Fix: Reduce heat to the lowest setting your burner allows. A true low simmer means one or two lazy bubbles every few seconds. Cook uncovered for the remaining time. If the chili is already done, add 120ml of water and simmer on very low for 15 more minutes.
Symptom: The chili tastes flat or thin despite using all the ingredients
Cause: The bloom step was too short, or it happened without enough fat because the reserved tablespoon of bacon fat was skipped. Midnight Smoke's aroma did not open into the fat, so it distributed through liquid as a colorant rather than binding into the base as a flavor.
Fix: For this pot, add an additional 1 teaspoon of Midnight Smoke directly to the simmering chili. It will not have the depth of a proper bloom, but it will add presence. Next time, reserve the tablespoon of bacon fat at the render, add it just before the spices, and stir for the full 45 to 60 seconds until the aroma shifts.
Symptom: The pork is dry and stringy rather than tender and pulling apart
Cause: The simmer was too vigorous for the pork to break down properly, or the cook time was cut short. Pork shoulder releases its collagen gradually over the full simmer. A hard boil tightens the muscle fibers before the collagen can soften them.
Fix: Reduce heat to a true low simmer and add 120ml of water. Continue cooking for another 30 minutes and check again. If the pork is still firm at that point, the cut used may have been pork loin rather than shoulder.
Symptom: The beans are mushy and falling apart in the finished bowl
Cause: The beans went in at the start of the simmer rather than the final 40 minutes. Canned beans are already fully cooked, and two hours of simmering breaks their skins and turns their interiors to paste.
Fix: For this pot, serve as is. The flavor is unaffected. Next time, hold the beans until 40 minutes before the end, adding them with the finishing stretch of the simmer.
Notes
Ground Pork Instead of Shoulder
Ground pork works well in place of pork shoulder and removes the diced-meat browning step. Use 340g (12 oz) of ground pork and add it to the pot after the ground beef in step 6, browning it the same way before transferring to the plate. Because ground pork lacks the collagen of shoulder, it will not contribute the same body to the braise, but the long simmer is still necessary for flavor. The finished chili will have a slightly finer, more uniform texture.
Better the Next Day
This chili improves significantly overnight. The smoke and chile flavors continue to settle and deepen as the chili rests in the refrigerator. Make it a day ahead, cool uncovered until no longer steaming, then cover and refrigerate. Reheat gently over low heat with a splash of water to loosen. The crispy bacon should be made fresh just before serving.
Leftovers and Freezing
Refrigerate in an airtight container for up to 4 days. The flavor deepens with each day. Freeze in portioned containers for up to 3 months. Reheat gently over low heat, adding a small amount of water to loosen if needed. Do not freeze the crispy bacon topping separately. Make it fresh.
Toppings and What Goes Alongside
The chili is rich and deeply seasoned. Toppings should be cool and bright: sour cream, shredded cheddar, chopped cilantro, and diced raw onion all work and provide the contrast the bowl needs. For sides, cornbread or plain rice carries the chili well. Crusty bread is a good option. Avoid heavily seasoned sides that would compete with the smoke.
Bacon as Structural Garnish
The crispy bacon reserved throughout the cook is not an optional topping. It is the disruptive texture the recipe requires. Crumble it coarsely rather than fine so each bowl gets a few distinct pieces that hold their crunch for several bites. Added at the very end rather than stirred in, it stays crisp long enough to do what it is there to do.
More recipes like this
New recipes and seasonal cooking ideas, once a week. Never more.
See everything that's in the newsletter